I loooove me a good burrito! Be it all snuggled in its foil wrapper, easily eaten on the go, or slathered in sauce and the size of a small infant, I am there for it, baby! I am a frequent visitor of taco trucks and hole-in-the-wall taco joints. This truck and this taqueria in my home town of West Seattle are two of my favorites. However, there is something to be said for not having to leave your house and having a delicious burrito ready and waiting for you in your freezer, mere minutes away from your mouth after a quick trip through the microwave (or in my counter-space challenged and thus microwave free home, a slightly more lengthy stay in the oven). Regardless of how you heat ’em up though, freezer burritos and breakfast burritos can seem like small miracles when you just can’t even but want something delicious and comforting to fill your belly.

Zoe can’t even…
Over the years, I have played around with this convenience food, trying different recipes and filling combinations and have discovered that the beauty of the frozen burrito is that there is no ULTIMATE RECIPE but rather, it is a dish that endlessly customizable and delicious in its many iterations so long as you follow a few basic principles of burrito making and a couple small but important freezer guidelines.
Burrito Principle #1: Have a variety of textures – No one enjoys a burrito that is just all mush. I mean, I love hella cheese and refried beans as much as the next person, but part of the joy of eating is variety – in texture as well as flavor. So, toss some cooked rice into that tortilla along with black or pinto beans that have been cooked and mashed slightly. Or leave your beans whole, but for the love of all that is sacred, make sure that they are cooked fully. No one likes under-cooked beans in their burrito. Then balance out the relatively soft textures of the rice and/or beans with some veggies like bell peppers and onions cooked to the point where they maintain a little crunch. And of course cheese and salsa to your liking!
Corollary of Burrito Principle #1: For breakfast burritos, replace beans and/or rice with hashbrowns and eggs scrambled with a little cheese, salt and pepper. I like to defrost some frozen hashbrowns or even tater tots and toss them with the cooked veggies.

Hashbrowns and veggies in the background and scrambled eggs with ham and cheese in the foreground destined for Denver Breakfast Burritos.
Burrito Principle #2: Don’t muddy the flavors – It may be tempting to really raid the spice cabinet here. I mean, when else are you going to use that artisanal ancho chili powder that you got at the farmers market last year? Or was it two years ago? First, check the sell by date. Odds are, many of your spices are past their prime and won’t be doing you any favors in whatever dish they land in. Second, be judicious about when and where you spice. For example, I like to use a boxed Mexican or Spanish rice for convenience sake when making my burritos. Near East is a brand that is readily available at grocery stores and makes a flavorful light (read: not gummy) rice for burritos. If I use a boxed rice, I ease off on the spices elsewhere. Maybe just some chili powder added to the veggies along with a splash of lemon juice and a half teaspoon each of cumin and coriander added to the beans. However, sometimes I will do a cilantro lime rice a la Chipotle and in that instance, I may add some more spices to the vegetables like paprika (sweet or smoked) and ancho or chipotle chili powder.
Burrito Principle #3: When it comes to cheese, its all about location, location, location! – Don’t just toss a handful cheese into your burrito and call it a day. You have been so thoughtful up to this point. Don’t leave, what is arguably the most important part of the burrito, to fate or your questionable rolling technique! It is always a little disappointing when we get to the very bottom of our burrito and there sits a large glob of cheese that would have been put to much better use lovingly woven throughout the whole. Slightly better, though not ideal, is when we bite into the burrito and see the clear demarcation if rice and beans and other fillings to cheese. Battle lines were drawn and the cheese stands alone to one side. Yes, it all comes together in your mouth, but perfection it is not. The answer to this, is to lay out your tortilla and then sprinkle shredded cheese all over that bad boy. Then add your other fillings to one side and get rolling. This way, the cheese is distributed throughout. It is cozying up to your other fillings but it is also hanging out between layers of tortilla, a happy cheesy surprise that makes every bite perfectly balanced. And, if you want to get REAL crazy, dollop some cheese sauce on top of your fillings to create a molten cheesy core. Take care: This technique is only for advanced burrito rollers and cheese fiends.

Ok, so you have got your burrito with all the fixins’. Is it ready to be rolled and frozen? Wait, step away from the burrito and attend to these two freezer guidelines:
Freezer Guideline #1: Don’t go crazy with the dairy – I mean, you went crazy with the cheese and that’s fine, but for these frozen burritos, leave the sour cream in the fridge. The water content in more liquid dairy products does not lend itself to home freezing, which is a slow process, inviting the formation of water crystals. No one wants ice in their burrito, which will melt and, separated from that fat, can turn your tasty creation into a soggy mess. Check out this really interesting article on the science behind freezing ice cream where the same fundamentals apply. You are totally welcome to heap sour cream on your warmed up burrito (or eat it straight out of the carton alongside…). I won’t judge.
Freezer Guideline #2: Keep the avocado on your toast and out of your burrito – Freezers do weird things to our favorite hipster health food. I am sure there is some science behind the phenomenon, involving enzymes and oxidation. Perhaps, I’ll do a deep dive into this in another post, but for now, trust me, just don’t do it. As with the sour cream, feel free to go crazy with the guac when it is time to eat the burrito. On top, on the side, EVERYWHERE!
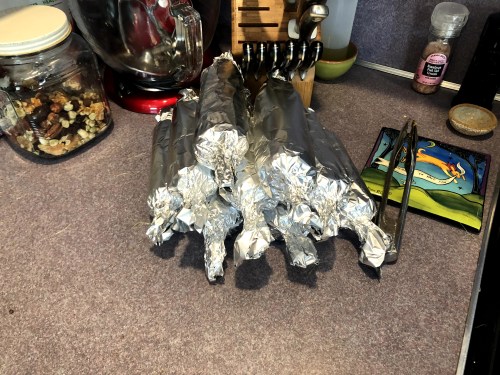
Now you have filled your burrito and followed the freezer guidelines like the A+ student that you are, and now it is time to roll those babies up and toss them in the freezer, a down payment on your future happiness. If you plan on baking them in the oven later, roll up in foil and then stack in a gallon freezer bag. If they are destined for the microwave, roll in parchment paper, then foil and the gallon freezer bag.
That’s it! Happy rolling! Below are a few articles that I found online and used as inspiration for my burrito adventuring.
Tablespoon.com – Freezer Friendly Denver Omelet Breakfast Burritos
Good Cheap Eats Freezer Burritos
The Kitchn How I Make Burritos to Freeze